Introduction
If you’ve ever wondered how to put pavers over dirt, you’re not alone. Homeowners in Daly City are increasingly choosing to create functional and attractive outdoor spaces using budget-friendly and DIY-friendly methods. Whether it’s for a patio, garden path, or small seating area, laying pavers directly over dirt can be a smart and rewarding weekend project.
Table of Contents
- Introduction
- Why Install Pavers Over Dirt?
- Can You Really Lay Pavers Directly on Dirt?
- Tools and Materials Needed
- Preparing the Ground: Key Considerations
- Step-by-Step Instructions
- Step 1: Plan Your Design
- Step 2: Mark the Area
- Step 3: Excavate the Soil
- Step 4: Compact the Base
- Step 5: Add a Sand or Gravel Layer
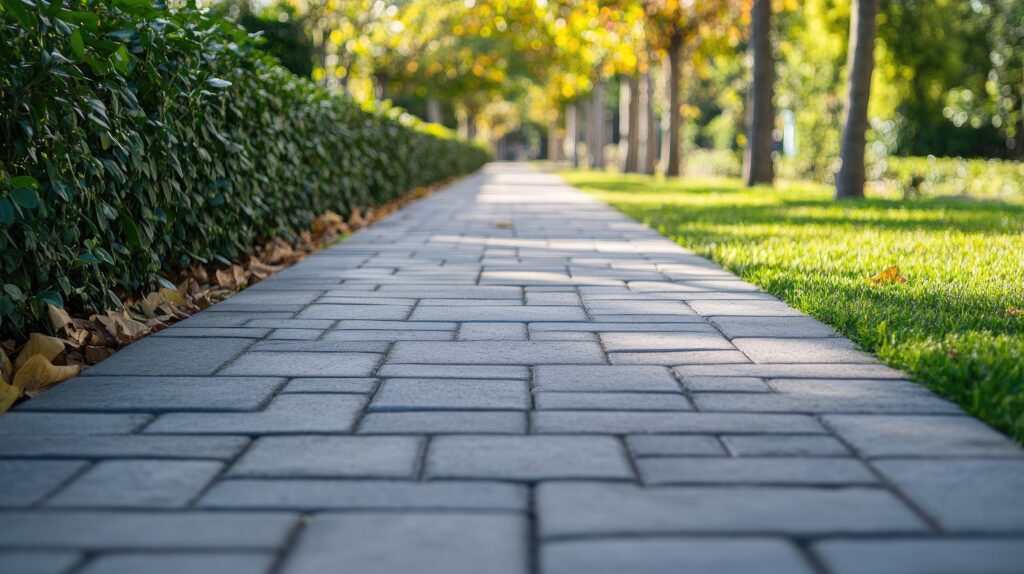
- Step 6: Lay the Pavers
- Step 7: Fill Gaps with Sand
- Step 8: Compact the Surface
- Tips for Long-Lasting Results
- Common Mistakes to Avoid
- Maintenance Tips for Pavers Laid on Dirt
- Where to Buy Pavers and Materials in Daly City
- Cost Breakdown of a DIY Paver Project
- Alternatives to Laying Pavers on Dirt
- Environmental Impact & Drainage Considerations
- Real-Life Examples from Daly City Homes
- FAQ: How to Put Pavers Over Dirt
- Conclusion
Why Install Pavers Over Dirt?
Installing pavers over dirt offers several benefits:
- Cost-effective
- Easy to do without heavy machinery
- Environmentally friendly
- Great for temporary or semi-permanent solutions
If done correctly, pavers laid over dirt can last for years with minimal upkeep.
Can You Really Lay Pavers Directly on Dirt?
Yes, you can. But it requires careful preparation to ensure they don’t shift or sink over time. The trick is understanding the process and following best practices.
This guide on how to put pavers over dirt covers everything you need to know for long-lasting results.
Learn more about professional paver services.
Tools and Materials Needed
- Measuring tape
- Garden hose or string (for marking)
- Shovel
- Rake
- Tamper or plate compactor
- Level
- Sand or crushed gravel
- Rubber mallet
- Broom
- Landscaping fabric (optional)
Preparing the Ground: Key Considerations
Before laying a single paver, assess:
- Soil drainage: Ensure it’s not waterlogged
- Surface stability: Avoid soft or loose soil
- Slope: Slight slope helps with water runoff
In Daly City, the climate can lead to compacted soils — a benefit for this type of project.
Step-by-Step Instructions
Step 1: Plan Your Design
Sketch your layout and calculate the number of pavers needed. Consider walkways, edges, and patterns.
Step 2: Mark the Area
Use string or garden hose to mark the layout. Add 6–12 inches around edges for stability.
Step 3: Excavate the Soil
Remove 4–6 inches of topsoil depending on paver thickness. Create a flat surface.
Step 4: Compact the Base
Use a hand tamper or plate compactor to pack the soil until it’s firm. This step is crucial in how to put pavers over dirt effectively.
Step 5: Add a Sand or Gravel Layer
Spread 1–2 inches of coarse sand or gravel. Level it out using a straight board or screed.
See detailed base preparation advice at The Spruce’s Guide to Installing Pavers.
Step 6: Lay the Pavers
Start in a corner and work your way out. Use a rubber mallet to gently tap each paver into place.
Step 7: Fill Gaps with Sand
Sweep fine sand over the surface and into the gaps. This locks the pavers together.
Step 8: Compact the Surface
Re-compact the entire area to set the pavers and ensure evenness.
Tips for Long-Lasting Results
- Use edging or paver restraints to prevent shifting
- Water the area lightly to settle the sand
- Refill joint sand periodically
Common Mistakes to Avoid
- Not compacting the base soil
- Skipping the sand or gravel layer
- Laying pavers unevenly
- Using soft topsoil as the base
Avoiding these ensures your how to put pavers over dirt project is successful.
Maintenance Tips for Pavers Laid on Dirt
- Check for weeds or grass growing between pavers
- Refill sand joints annually
- Power wash occasionally
- Re-level any shifted pavers
Where to Buy Pavers and Materials in Daly City
- Lowe’s Home Improvement (South San Francisco)
- Home Depot (Colma Blvd)
- Local landscaping supply stores
Choose quality pavers that suit your design and foot traffic needs.
For more paver style ideas and installation tips, check out Paver Types and Designs.
Cost Breakdown of a DIY Paver Project
Item | Estimated Cost |
Pavers | $2–$5 per sq ft |
Sand/Gravel | $0.50–$1 per sq ft |
Tools (rentals) | $50–$100 total |
Total cost for a 100 sq ft project: $250–$600 depending on paver choice.
Alternatives to Laying Pavers on Dirt
- Concrete pads
- Gravel patios
- Raised wooden decking
- Rubber paver mats
Each has its pros and cons depending on permanence, budget, and aesthetics.
Environmental Impact & Drainage Considerations
Laying pavers on dirt allows for natural water infiltration, reducing runoff. However, ensure the base is stable enough to prevent erosion or sinking.
Real-Life Examples from Daly City Homes
Many homeowners in Daly City have used this method for:
- Garden pathways
- Outdoor fire pit areas
- Low-maintenance patios
Check local neighborhood groups or home improvement forums for visual inspiration.
FAQ: How to Put Pavers Over Dirt
Q: Will the pavers sink over time?
Only if the base is poorly compacted or drainage is poor.
Q: Can I drive on pavers laid over dirt?
Not recommended. For driveways, a deeper gravel base is required.
Q: How long does the installation take?
Most small projects take 1–2 days depending on size and prep.
Conclusion
Now that you know how to put pavers over dirt, it’s time to roll up your sleeves and start transforming your yard. With the right prep and materials, a weekend of work can result in a beautiful, functional space you’ll enjoy for years to come.
Get your free estimate today, contact us now.