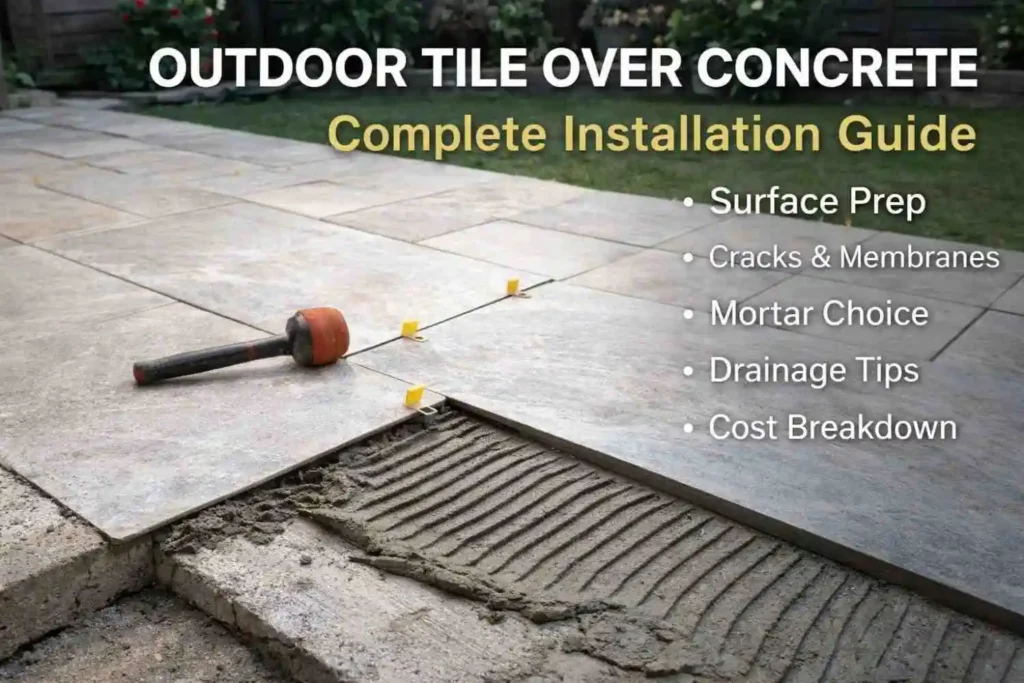
Can You Install Outdoor Tile Over Concrete?
Yes, you can install outdoor tile over concrete — but only if the slab is structurally sound, properly cured, moisture-stable, and correctly prepared. Outdoor tile installation over concrete requires surface evaluation, crack treatment, proper drainage slope, movement joint planning, use of exterior-rated thin-set mortar, and often an anti-fracture or uncoupling membrane to prevent stress transfer.
When installed correctly, outdoor tile over concrete can last decades.
When installed incorrectly, failure can occur in a single freeze-thaw cycle.
This guide explains the difference.
Understanding the Concrete Slab Before You Tile
Tiling success is determined long before the first tile is laid.
Concrete is not static. It moves, expands, contracts, absorbs moisture, and cracks. Tile does not tolerate uncontrolled movement.
Before installing outdoor tile over concrete, evaluate the following:
1. Age of the Slab
Concrete must cure for at least 28 days before tile installation. Fresh slabs contain excess moisture and ongoing shrinkage, which can compromise adhesion.
2. Structural Integrity
Check for:
• Settlement cracks wider than 1/8 inch
• Heaving or sinking areas
• Hollow-sounding spots
• Spalling or surface delamination
If structural movement exists, tiling will not solve the problem — it will mirror it.
3. Surface Flatness
Industry standards typically allow no more than 1/4 inch variation in 10 feet for tile installation. Uneven surfaces require grinding or self-leveling compound.
4. Drainage Slope
Exterior concrete should slope 1/4 inch per foot away from the structure. Standing water leads to freeze damage and grout deterioration.
If the slab holds water, correction is required before tile installation.
Moisture: The Silent Failure Factor
Outdoor concrete continuously absorbs and releases moisture.
Moisture problems cause:
• Efflorescence
• Bond failure
• Tile lifting
• Grout cracking
Before installing tile:
• Perform a moisture vapor test if possible
• Check for previous sealers or coatings
• Ensure slab is clean and breathable
In humid or freeze-prone climates, installing a waterproofing or uncoupling membrane is strongly recommended.
Control Joints and Expansion Planning
One of the most common causes of tile failure is ignoring movement joints.
Concrete slabs contain control joints to manage cracking. These joints must never be tiled over rigidly.
Proper installation includes:
• Honoring control joints through the tile layout
• Installing movement joints every 8–12 feet in exterior applications
• Leaving perimeter expansion gaps
Tile must be allowed to move independently from the slab.
Skipping this step almost guarantees cracking.
Surface Preparation: Professional Standards
Preparation is not optional — it is the foundation of longevity.
Step 1: Remove Contaminants
Concrete must be free of:
• Paint
• Sealers
• Oil
• Grease
• Curing compounds
Mechanical abrasion (grinding) may be necessary if coatings are present.
Step 2: Repair Cracks
Hairline cracks can be filled with flexible crack isolation compounds. Structural cracks require professional evaluation.
Step 3: Grind High Spots
Large-format tile requires flatness. Grinding ensures full mortar contact and prevents hollow spots.
Step 4: Prime the Surface (If Required)
Some substrates require bonding primers depending on mortar type and slab condition.
Do You Need an Anti-Fracture or Uncoupling Membrane?
In most exterior tile-over-concrete applications — yes.
An anti-fracture membrane:
• Absorbs minor slab movement
• Reduces stress transfer
• Improves long-term durability
• Provides moisture barrier benefits
This is especially critical in freeze-thaw climates where seasonal expansion occurs.
Skipping this layer is one of the biggest risks in DIY installations.
Choosing the Right Outdoor Tile
Not all tile is suitable for exterior concrete installation.
Porcelain Tile (Best Overall Choice)
• Low water absorption rate (<0.5%)
• Highly freeze-thaw resistant
• Durable under foot traffic
• Available in multiple finishes
Porcelain is the most reliable long-term option.
Natural Stone
• Aesthetic appeal
• Requires sealing
• Must be rated for frost resistance
• More maintenance required
Concrete Pavers
• Cost-effective
• Flexible installation
• Easier replacement
Interlocking Deck Tiles
• Surface-level upgrade
• Suitable for temporary or light-use applications
For safety, choose tiles rated for exterior slip resistance (look for DCOF ratings).
Mortar and Adhesive Selection
Exterior applications require polymer-modified thin-set mortar rated for outdoor use.
Never use:
• Interior-only adhesives
• Mastic-based products
• General-purpose construction adhesive
Exterior mortar must:
• Resist temperature fluctuations
• Maintain bond strength under moisture exposure
• Support freeze-thaw cycling
Consult manufacturer specifications carefully.
Tile Layout & Installation Process
Step 1: Dry Layout
Plan tile placement and movement joints before applying mortar.
Step 2: Apply Mortar with Notched Trowel
Use the correct notch size for tile dimensions to ensure full coverage.
Large-format tiles require back-buttering to eliminate air gaps.
Step 3: Install Tile with Proper Spacing
Use spacers for consistent grout lines. Maintain expansion gaps along perimeter edges.
Step 4: Grouting
Choose weather-resistant grout suitable for outdoor use.
Grout must be packed fully into joints and cleaned properly.
Step 5: Sealing (If Required)
Natural stone and some grout types require sealing to prevent moisture penetration.
Freeze-Thaw Engineering Explained
When water enters microscopic pores in concrete or grout and freezes, it expands by approximately 9%.
Repeated freeze-thaw cycles cause:
• Surface cracking
• Tile delamination
• Grout separation
Mitigation strategies include:
• Low-absorption tile
• Proper drainage
• Anti-fracture membranes
• Exterior-rated mortar
This is why preparation determines durability.
Cost Breakdown for Outdoor Tile Over Concrete
Installation cost depends on:
• Tile type
• Slab condition
• Size of patio
• Pattern complexity
• Membrane installation
• Labor rates
Estimated range:
$5 to $35 per square foot (materials and labor combined)
Premium porcelain and complex layouts increase cost.
Slab repair also increases overall investment.
Common Installation Failures
The majority of tile failures trace back to one of these mistakes:
• Tiling over uncleaned or sealed concrete
• Ignoring control joints
• No expansion gaps
• Using interior mortar outdoors
• Installing on moisture-compromised slabs
• Poor slope leading to standing water
Understanding these risks is essential before proceeding.
Maintenance & Long-Term Performance
Properly installed outdoor tile over concrete can last 20+ years.
Maintenance includes:
• Seasonal inspection of grout lines
• Cleaning with mild detergent
• Resealing natural stone periodically
• Repairing cracked grout early
Porcelain tile requires minimal upkeep compared to stone.
DIY vs Professional Installation
DIY may be appropriate if:
• Slab is in excellent condition
• No structural cracking exists
• Drainage slope is confirmed
• Climate is mild
• Installer understands expansion joint planning
Professional installation is recommended when:
• Freeze-thaw risk is present
• Slab has previous cracking
• Complex tile patterns are desired
• Long-term durability is a priority
A contractor understands substrate movement, joint engineering, and product compatibility.
Frequently Asked Questions
Can I install outdoor tile directly over concrete?
Yes, if the slab is structurally sound, properly prepared, and moisture-controlled.
Do I need underlayment for tile over concrete?
In many climates, an anti-fracture membrane is strongly recommended.
What is the cheapest way to cover a concrete patio?
Interlocking deck tiles or concrete pavers are typically the most affordable solutions.
How long does outdoor tile over concrete last?
With proper preparation and installation, 20 years or more.
Final Thoughts
Installing outdoor tile over concrete is not just a cosmetic upgrade — it is a structural decision.
The longevity of the installation depends on:
• Slab stability
• Surface preparation
• Moisture management
• Expansion joint planning
• Proper materials
When engineered correctly, tile over concrete delivers durability, safety, and aesthetic value that significantly enhances outdoor living spaces.
When shortcuts are taken, failure is inevitable.
Preparation determines performance.
Read More Outdoor Tile Over Concrete Related Content